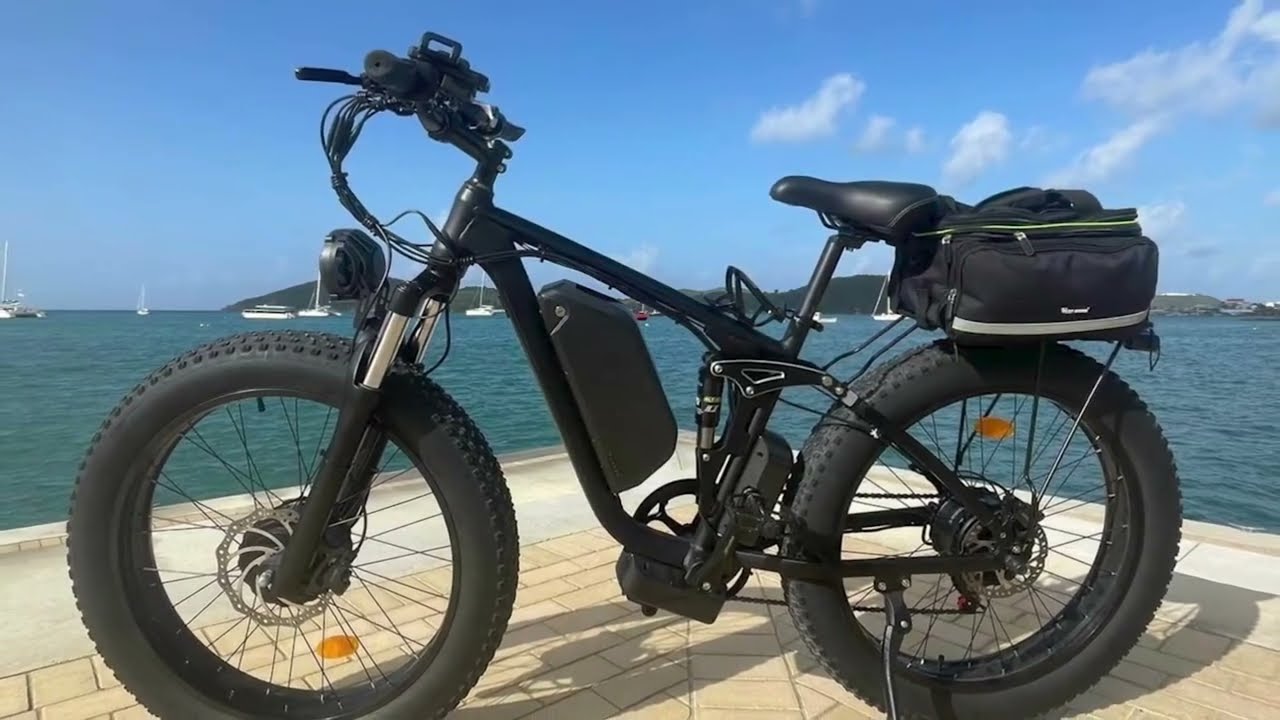
You finally bought the best fat tire bike, and now every weekend looks like a postcard—snow, sand, mud, you name it. But here’s the rub: those monster tires and beefy parts need more love than your old city cruiser, and skipping upkeep can turn epic rides into “walk-the-bike-home” stories. To keep the best fat tire bike shredding happily, follow these five habits:
-
Dial tire pressure before every ride
-
Wipe and lube the chain weekly
-
Inspect brake pads monthly
-
Check bolts for torque seasonally
-
Book a pro fork service yearly.
Over the next sections, we’ll dive into daily tweaks, monthly deep cleans, and pro-level touch-ups—sprinkled with quick tips, warnings, and a handy table—so your best fat tire bike stays grin-worthy for years.
Best Fat Tire Bike Daily TLC
A few minutes of care before and after each spin will save hours of workshop time later. Think of it as brushing your teeth—short, simple, and non-negotiable. Check tire pressure, clear mud, and eyeball the drivetrain for gunk. A clean bike not only looks sharp, but it also reveals loose parts before they become trailside disasters. Below are three bite-sized tasks every rider should memorize, all tuned for the best fat tire bike’s extra width and weight. Complete the trio and you’ll leave the driveway confident, quiet, and ready to float over any surface Mother Nature throws down.
Tire Pressure Perfecto
Fat tires feel magical because low PSI spreads rubber like a snowshoe. Shoot for 5-8 PSI on snow, 8-12 PSI on sand, and 12-15 PSI on rough dirt. Squeeze both tires; they should dimple but not fold. A digital gauge beats the thumb test, especially on the best fat tire bike running tubeless setups.
Lube Love
After every wet ride, spin the pedals backward and drip lube on each chain link. Wipe excess with a rag so grit doesn’t stick. Choose wet lube for sloppy weather, dry lube for dust. This 60-second ritual cuts noise and delays expensive cassette swaps.
Quick Bolt Check
Bounce the bike from ankle height; listen for clunks. Finger-test stem bolts, derailleur mounting screws, and rack hardware. Snug anything loose with a multi-tool, but resist Hulk strength—most fasteners only need 5-8 Nm. Ten seconds now beats a roadside scavenger hunt for fallen parts.
Weekly Wheel Checks: Air, Spokes, and Seals
Big tires equal big contact patches, so they take a pounding. Once a week, inflate to your usual PSI and let the bike sit for five minutes. If pressure drops, soap-test the rim for burps or valve leaks. Spin the wheels and watch the gap between the tire and frame; wobbles hint at loose spokes. Pinch each spoke pair—tone should match across the wheel like strings on a guitar. Finally, peek at the tubeless sealant by popping one tire bead. If the milky swirl looks dry, inject two ounces. Keeping wheels healthy means the best fat tire bike keeps floating instead of flopping.
Info: A wheel losing more than 3 PSI overnight needs leak hunting before your next adventure.
Monthly Drivetrain Detox: Chain, Cassette, and Cranks
Mud plus sand equals the perfect grinding paste. Each month, degrease the chain in a cleaner tool, brush cogs, and floss jockey wheels with a zip tie. Measure chain stretch with a gauge—replace at 0.75 % wear to protect the cassette. Pull crank arms and dab grease on spindle splines; winter slush loves to creep in there. While the cranks are off, spin bottom-bracket bearings with a finger. Crunchy feel? Time for new cartridges. A sparkling drivetrain keeps power transfer crisp and leaves the best fat tire bike ready for moon-lit snow rides.
Quick Tip: Store a cheap paintbrush in your toolbox—the bristles fit perfectly between cassette teeth.
Brake Bliss: Squeal-Free Stopping Power
Fat bikes gain speed downhill thanks to rolling momentum, so dependable brakes are life insurance. Inspect pad thickness; swap pads when the compound thins to a fingernail. Clean rotors with isopropyl alcohol, never with greasy sprays. If you hear a turkey-gobble squeal, lightly sand pads with 120-grit paper to knock off glaze. Hydraulic setups need a bleed every six months; air bubbles feel like spongy levers on sub-zero days. For mechanical brakes, lube the cable housings where they curve. Done right, a one-finger pull halts the best fat tire bike even on icy descents.
Suggestion: Color-code pad sets front and rear to track wear at a glance.
Suspension Savvy: Fork and Shock Care
Not every fat bike sports squishy bits, but if yours does, pamper them. Wipe fork stanchions after every ride to remove abrasive dust. Monthly, pop off the dust wipers and add a drop of suspension oil. Check air pressure against manufacturer charts—cold weather shrinks air, so a fork set in July may sag in January. Annually (or 100 hours), schedule a full damper and seal service with a pro shop. Properly tuned suspension lets the best fat tire bike glide over roots without pogo-sticking, saving wrists and keeping traction glued.
Danger: Overfilling air chambers can burst negative seals—follow max PSI labels strictly!
Frame and Fasteners: The Silent Guardians
A fat-bike frame handles side loads stronger than most mountain rigs thanks to wider hubs. Still, winter salt and beach sand attack metal. Rinse the frame with low-pressure water, then towel dry; high-pressure jets drive grit into bearings. Inspect welds for hairline cracks, especially near the bottom-bracket cluster where torque peaks. Grease seat-post shims and stem steerer tubes to stop creaks. Check rack mounts; loose bolts can ovalize eyelets. Spending 150 words on this chore means the best fat tire bike frame stays whisper-quiet and under warranty instead of on a welding bench.
Fact: Aluminum corrodes eight times faster in saltwater than freshwater—rinse beach rides ASAP.
Winter Storage Prep: Off-Season Shielding
When daylight shrinks, the bike might hibernate. Wash thoroughly, dry, and coat the chain with heavy wax lube—it hardens into a moisture barrier. Drop tire PSI to half; this prevents sidewall cracks. Hang the bike by the frame, not the wheels, so fork seals aren’t compressed for months. Remove the battery if your fat bike has electric assist; store it at 60 % charge in a cool room. Finally, drape a breathable cover to block dust but allow moisture to escape. Come spring, the best fat tire bike will roll out smelling like freedom, not a musty basement.
Warnings: Never store a bike near furnace exhaust—ozone dries out rubber seals.
Trailside Repair Kit: What to Carry
Even the best plan meets sharp rocks. Pack a mini-pump rated to 30 PSI (fat tires need volume), two stout tire levers, a 6-in-1 multi-tool, quick-link, tubeless plug kit, and a spare valve core. Zip-tie a dollar bill inside your handlebar grip—it patches sidewall tears. A tiny bottle of chain lube doubles as a squeak killer for pedals. In deep snow, stash a compact shovel to dig the rear wheel free. With this kit, the best fat tire bike turns mishaps into short pit-stops, not epic rescues.
Pro Service Intervals: When to Call the Shop
DIY is noble, but some jobs need torque wrenches longer than your arm. Fork damper rebuilds, dropper-post overhauls, and wheel-hub bearing presses require special jigs. Every 500 trail miles, hand the best fat tire bike to certified mechanics for a full health check: headset tension, wheel true, brake bleed, and firmware updates for e-assist models. Pro shops also log serial numbers for warranty claims. Think of this tune-up like dentist visits—twice a year keeps trouble minor and resale value high.
Info: Shops often bundle winter overhauls with storage plans—ask for discounts on parts swaps.
Eco-Friendly Cleaning: Shine Without Waste
Foamy soaps look fun, but strip lube into storm drains. Instead, fill a spray bottle with warm water and a drop of biodegradable dish liquid. Mist the frame, agitate with a soft brush, then rinse gently. Old toothbrushes reach cassette crevices. Use rags cut from worn T-shirts; wash and reuse. Skip aerosol degreasers; citrus-based gels cling longer and use less. Collect dirty runoff in a bucket and pour it through a coffee-filter funnel before dumping—oil stays trapped. Your neighborhood—and the best fat tire bike—both stay sparkling without guilt.
Maintenance Frequency Cheat-Sheet
|
Task |
Quick Time |
Deep Time |
Frequency |
|
Tire-pressure check |
1 min |
— |
Before every ride |
|
Chain wipe & lube |
3 min |
10 min |
Weekly |
|
Wheel spoke tension |
2 min |
15 min true |
Monthly |
|
Brake pad inspection |
1 min |
20 min swap |
Monthly |
|
Suspension lower-leg service |
— |
45 min |
Yearly |
Suggestion: Print this table, laminate it, and hang it near your bike stand for instant reminders.
Conclusion
Caring for the best fat tire bike isn’t rocket science; it’s a rhythm. Daily pressure squeezes, weekly chain wipes, monthly wheel trues, seasonal deep dives, and annual pro checkups form an easy beat that keeps rides smooth. Follow the tips, heed the quick boxes, and jot down the cheat sheet, and your fat-tread monster will stay adventure-ready for countless dawn patrols and midnight beach cruises. Keep the rituals light, keep them regular, and the payoff is priceless: fewer breakdowns, safer descents, and endless grins splashing through mud.
FAQs
How low can I safely drop tire pressure?
Most rims let you run 5 PSI, but ride carefully; below that risks pinch flats or bead burps.
How often should I bleed hydraulic brakes?
Every six months or after any lever feels spongy, even sooner if you ride in sub-zero temps.
Is tubeless worth the extra setup?
Yes. Fewer flats, lower pressures, and better traction outweigh the occasional sealant top-up.
Can I use car wash soap on my bike?
Avoid it; automotive detergents can strip grease and fade anodized parts. Use mild, bike-safe cleaners.
Does frame material change maintenance?
Steel needs rust prevention, aluminum hates salt, and carbon prefers lower clamp torque—adjust care accordingly.


Share:
What Safety Features Should a Good Electric Scooter Have?
What Is the Ideal Tire Pressure for a Fat Tire Ebike?